I’m going to tell you something that you may not know about me.
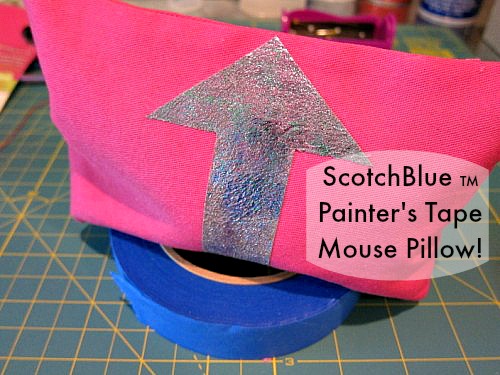
I love to sew rectangles! I also love to create Mouse Pillows. So here is a little Mouse Pillow How-To for you, using ScotchBlue TM Painter’s Tape to form a great, simple graphic ARROW!
So, when I got my hands on a roll of ScotchBlue TM Painter’s Tape recently, into my brain popped a simple, effective RECTANGLE of practical FUN!
Welcome to my How-To on making a 5″ x 7″ Arrow Mouse Pillow!
It will save your wrist from the sharp edge of your computer desk.
Promise.
This is not a hard craft to complete.
Promise.
If you can sew a straight seam and you can burnish a few pieces of tape onto fabric, you can do this!
This post has a bunch of photos, but I tend to be a visual learner. Are you?
See. now isn’t that easy so far? You can cut a double layer of TWO 5.5″ x 7.5″ pieces of sturdy fabric, if you want. Then you can make TWO Mouse Pillows to give you comfort while you are typing on your keyboard!
I do want to disclose that I was sent this roll of ScotchBlue TM Painter’s Tape, in case I might want to craft with it! I did! This tutorial and my opinions are all my own!
Love this Blue Roll of goodness for more than just painting a wall!
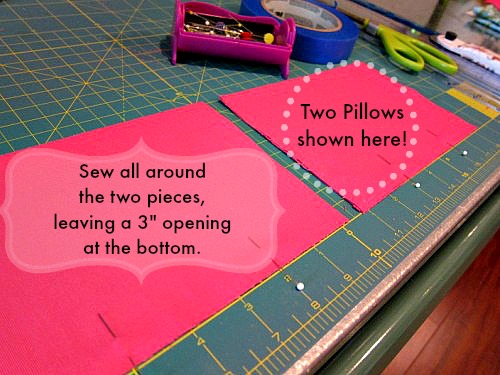
Sew a 1/2″ seam all around the rectangle, leaving a 3″ centered opening at the bottom.
I like to make sure, when ironing, that my mouse pillow rectangle is ironed with all of the sides poked out to be as straight as they can be. Makes for a straighter Mouse Pillow~
This is the fun part where the ScotchBlue TM Painter’s Tape does its magic! Low tech way to make an ARROW from 5 pieces of tape.
To make sure the three pieces of tape were evenly 1.25″ from the top, I just placed my ruler at the 1.25 mark, down from the top, over the tape.
I just tore all three pieces across the ruler. It made for a very clean cut!
Then I burnished two more pieces of tape from the center top, where the pin was, down to the outer edges of the outer two tape edges. The photo shows it better than I can describe it!
You can see that I used a couple of scraps of tape to further mask beyond the side points of the arrow. Burnish all down very well.
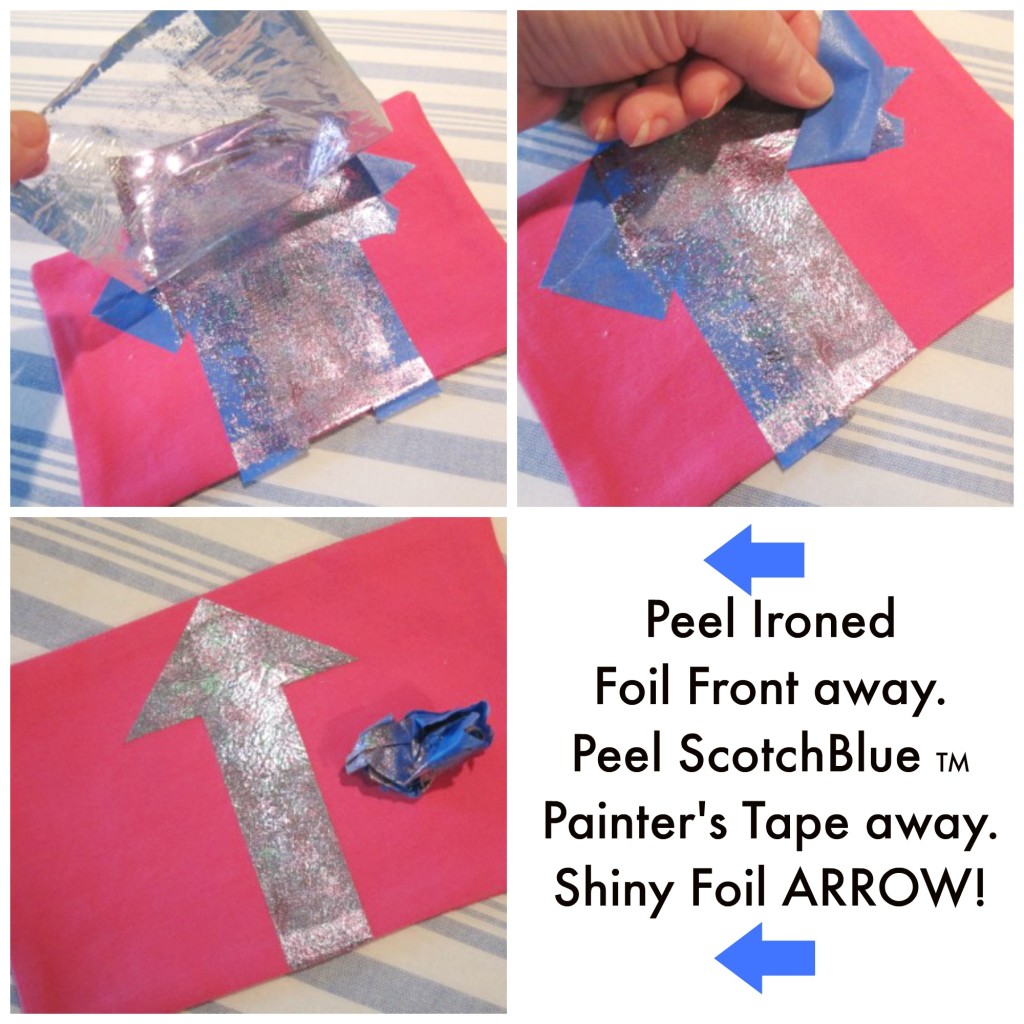
Now this is where my Mouse Pillow How-To takes a little turn… For this particular Mouse Pillow I wanted to play with some fun Iron On Foil that I have had around forever. I also had the Foil Transfer Adhesive, and wanted to try it to jazz up the Arrow.
The adhesive was very professionally applied using… my finger. Even though I had found the foil and adhesive, I just couldn’t find my stash of pouncers, or stenciling brushes. Don’t tell me you haven’t done something similar! We are CRAFTERS! See us “make-do!”
Might I suggest you use some Rub n Buff cream or fabric paint. I do honestly believe that is what I would do if this pillow needed to come together quickly. I say this because the adhesive needs to dry for at least THREE HOURS. Um… I had not read that part of the directions before using. So, I waited.
Now for the fun part!
Before ironing you could remove the ScotchBlue TM Painter’s Tape. I wanted to see if the tape would stand up to the iron without leaving any residue. It held up fine! I told you I was playing!
TA DA! A shiny, malleable Foil Arrow! Of course, fabric paint would be wonderful, too! (And faster.)
Next… (nearing the end!)
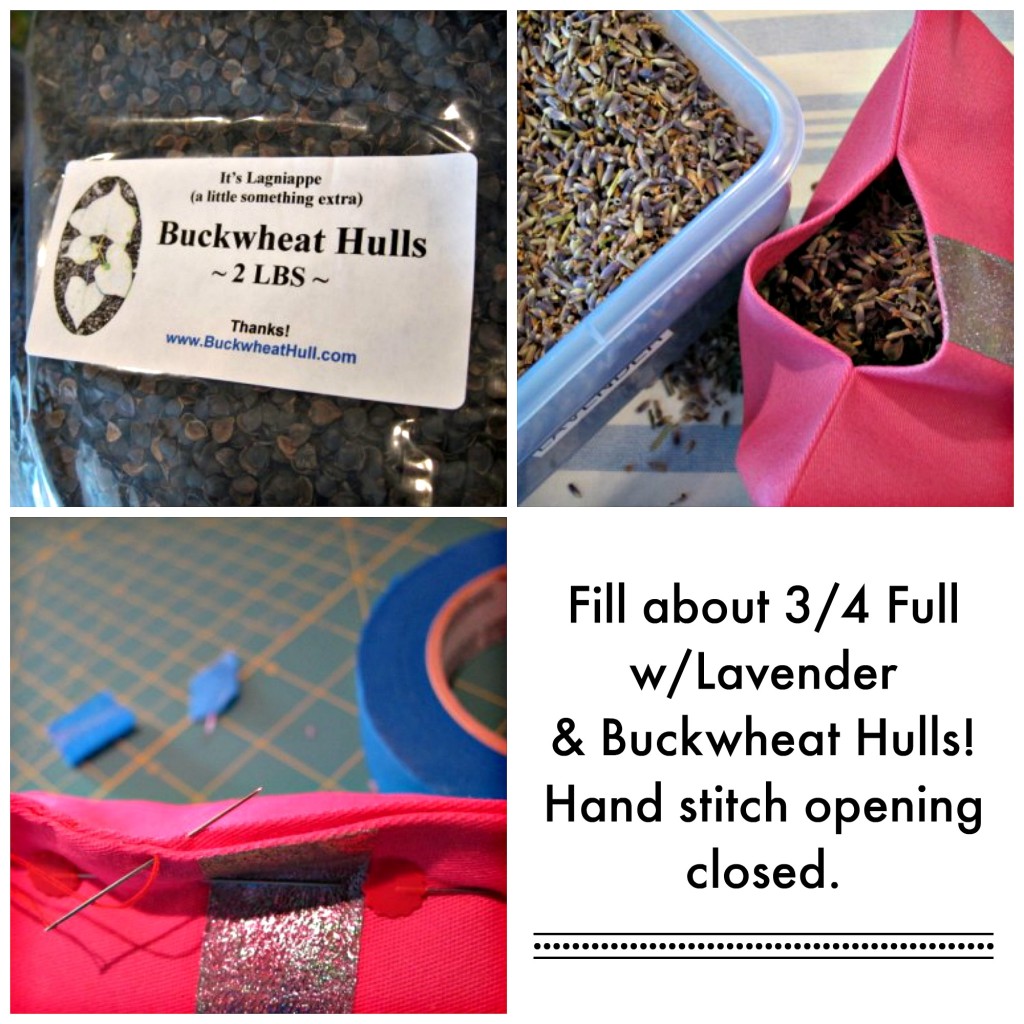
I happen to keep a stash of Buckwheat Hulls, along with fragrant Lavender Buds. The Hulls keep the pillow light and malleable, easily conforming to your wrist. I use about 2/3 Buckwheat Hulls and 1/3 Lavender to each Mouse Pillow. I fill the Pillow about 3/4 of the way full .
So, there you have it! Snuggle your Mouse Pillow below your mouse on your computer desk and your wrist will thank you for protecting it from that mean old sharp edge!
I keep one in my laptop bag, too. It barely takes up any room, and really does do the job. The ARROW points to “YES!”


How clever you are to think of a resting place for your wrists while on the computer, Kim!! My son does complain about his wrists hurting from being on his laptop, come to think of it…..Love the pink and shiny arrow, too 🙂
Thanks so much, Melanie! I can make guy ones, too! So can you, using the tutorial! Heh heh.
Cool idea! If I didn’t use a laptop then I would totally make one of these. But I might have to try the foil arrow on something else at some point! How fun!
Thanks for your comment, Erin! Let me know if you do the foil arrow on another project. That would be great to see!
I love it and I love that you put lavender in it to calm you while you work ha ha!
I love lavender, too, Kelley! I love to crunch up the insides of the Mouse Pillow so I can release the lavender scent!
Great Idea, Kim!!!